It’s What’s Inside That Counts

Today I just wanted to share some lovely food photography with you all. It’s quite unusual and really rather wonderful too!

This collection of photographs come by way of New York based photographer Beth Galton, who has turned simple food items into incredibly striking conceptual art. In this ‘Cut Food Series’ she dishes up some fascinating images, allowing for a surprising glimpse of cross-sections of the food we eat.

The photographs I found particularly interesting were the ones of the liquids, especially the coffee. I love how dramatic the creamy swirls of milk look, appearing as though they’re loftily dancing about within the contrasting, deeply-hued cup of coffee. It’s quite odd knowing that they are in fact stationary though. I wonder how she got the liquid to set before the milk fully dispersed? Hmm, puzzling.

I_02-68_120328-Cut-Foods-37184

I_05-82-83_120328-Cut-Foods-36254_New

I_07-86_120328-Cut-Foods-36294

I_08-88-89_120328-Cut-Foods-36949

I_04-74_120328-Cut-Foods-36459

I_06-82_120328-Cut-Foods-36738

I_03-70-71_120328-Cut-Foods-36433

I_01-66-67_120328-Cut-Foods-36487

‘This series was inspired by an assignment in which we were asked to cut a burrito in half for a client. Normally for a job we photograph the surface of food, occasionally taking a bite or a piece out, but rarely the cross section of a finished dish. By cutting these items in half we move past the simple appetite appeal we normally try to achieve and explore the interior worlds of these products.’ Beth Galton

Back To Porridge

Porridge, when made the right way, is a lovely thing indeed. It’s perfect for those days when all you want for breakfast is something warm and comforting, containing only a few simple ingredients.

This past week I’ve been all about the porridge. I’ve been having it every single morning. I caught myself thinking about it late one evening and was wondering about the pre-soaking stage some people do before actually cooking it. I know it’s traditional and all, but does it really make much of a difference? For the amount of effort which actually goes into it, I thought I’d give it a go. From boiling the kettle it literally took me all of 20 seconds, and you know, I think I’m a convert. This extra little step really helps in softening the oats so that when they’re cooked the overall texture is nice and creamy.

It seems almost funny giving you a recipe for porridge because it’s one of those things that epitomises the word ‘basic’. People don’t tend to get over-excited about it. I really like it though. And that term ‘Back to Porridge’? Come on, what is that all about? Don’t say it like it’s a bad thing! I may have to reinvent the phrase and just start using it more positively. “What time is it?! Morning?? Oooh! Back to porridge!”

I think the trick to making a really tasty porridge is all in the amount of time it cooks for. Soaking the oats overnight does cut back on the cooking time a little, but even so, I still like to simmer it for a good 20 minutes or so. This recipe is so easy it almost isn’t one and takes very little effort on your part, so get it in your repertoire!

The Perfect Bowl of Porridge – Serves 1 very hungry individual

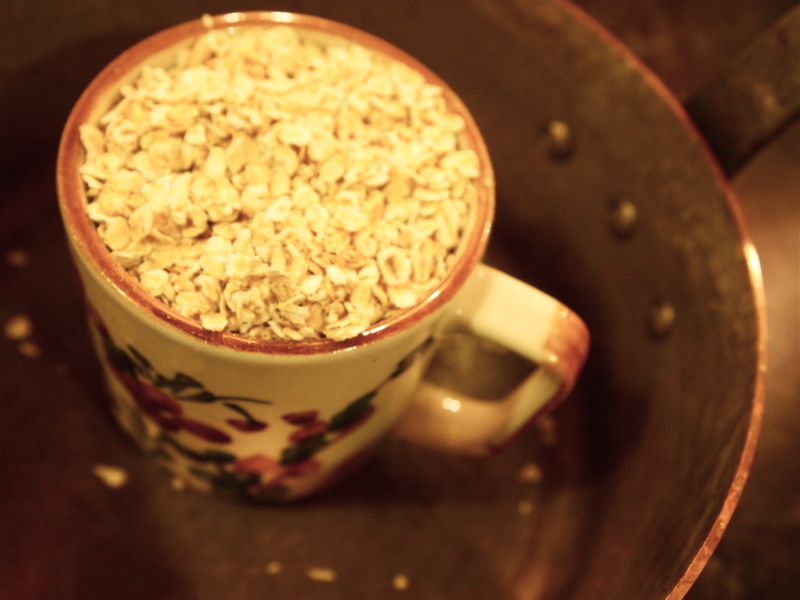
1/2 cup organic rolled oats

1 cup freshly boiled water

1/2 cup milk

a pinch of sea salt

Method

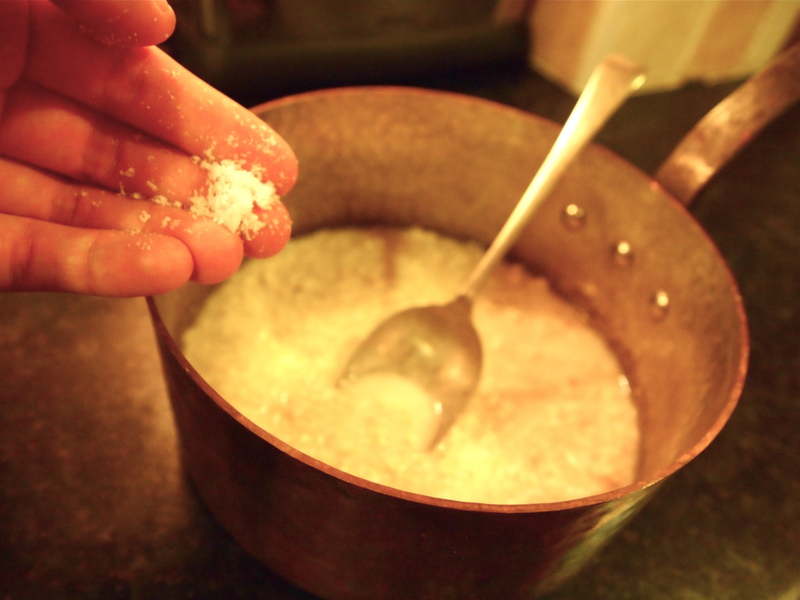
Put the oats in a saucepan and add the hot water and pinch of salt. Give it a stir, then cover with a tea towel overnight.

Organic Rolled OatsOrganic Rolled OatsPorridgePorridgePorridge

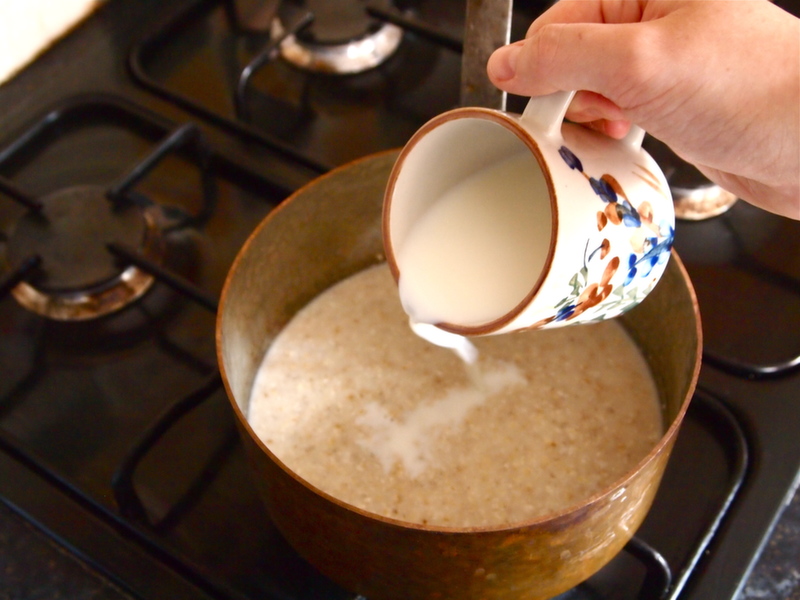
The following morning, add the milk to the soaked oats and simmer for about 20 minutes on the lowest heat possible. Add a little extra milk if it gets too thick or dry.

PorridgeOLYMPUS DIGITAL CAMERA

After simmering, your porridge should have thickened to a nice creamy consistency. Now get it into a bowl because it’s almost ready to eat!

Porridge

I usually eat mine with a squeeze of honey or maple syrup, but this week I’ve reverted back to my childhood and have been really enjoying it with a bit of soft brown demerara sugar and a splash of milk. That is where it’s at.

PorridgePorridge

If you forget to soak the oats the night before it’s not the end of the world! Just soak them for about 15 or 20 minutes prior to cooking, then simmer for about half an hour adding a little extra milk if necessary.

For this recipe I specify a half cup measure of oats, an American measurement which holds 125ml, but really any small mug will do.

Porridge is great eaten with so many different toppings: Maple syrup, honey, or agave nectar. Whatever nuts and seeds you happen to like. Try it with some dried fruit, like raisins or sultanas, figs, sour cherries or dates, or fresh fruit like sliced juicy pears, peaches or nectarines. Another good combo you should try is banana and peanut butter – Just stir in a spoonful of peanut butter into the porridge towards the end of the cooking time along with some sliced banana. When the banana is stirred into the hot porridge it gets a little cooked and becomes reminiscent of the inside of a banana fritter… Yeeaahh that’s right! If that, for some reason unknown to me, is not your thing, just slice some over the top once it’s in the bowl. Whichever topping you decide to opt for, it will taste great, and if not, I will eat my hat, so pick a good’un because I don’t really want to, okay? Thanks.

Super Tuber!

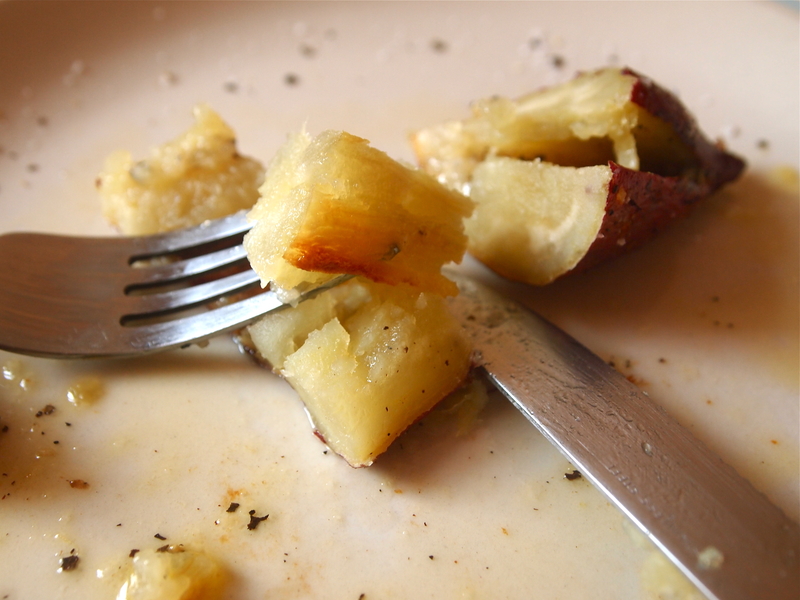
Last week I tried my very first Japanese sweet potato, known in Japan as Satsuma-imo. I’m already a big fan of the standard orange fleshed variety, but I was fancying something a little different so I thought I’d give these ones a shot. Aesthetically they look lovely! The skin is a nice vibrant reddish colour with slight traces of purple and they have a creamy white interior. I wanted to cook them very simply this time so their true flavour would shine through without any distractions.

Japanese Sweet Potato

All I did with these little babies was preheat the oven to 180°C, wash and dry them, then loosely wrap up each potato with a small splash of oil in some tin foil. You can also add a pinch of salt if you feel that way inclined, or just leave them as is like I did. Make sure you scrunch the seam of the foil up nice and tight though so none of the moisture escapes. This moisture helps steam the potato cooked, but because it’s being baked in the oven the base gets a little bit crisp and chewy! The best bit!

Japanese Sweet Potato

Put your litte foil parcels on a baking tray and bake them for around 45 minutes to an hour. The cooking time will vary a bit depending on the size of the sweet potatoes and how hot your oven gets, but just check by piercing them with a knife and if they seem soft and the knife goes in with very little resistance then they’re done!

Japanese Sweet Potato

The first one I had I ate completely plain so I could appreciate the flavour for what it was, and it is by all means a natural beauty! It was lovely and sweet and had a slightly drier texture to the usual orange fleshed kind. Not in a bad way though. It actually made it taste reminiscent of chestnuts, which I love, so that was a very nice surprise! No. 2 was enjoyed with a slick of butter and salt and pepper! Both tasted good in different ways. I’m pretty sure Satsuma-imo connoisseurs in Japan who buy theirs fresh from the market, plucked straight from their garden or from street vendors who cook then bury them in gravel to retain their moisture, would consider putting anything on top of these beauties sacrilege! I do agree though, they don’t really need anything, except maybe a glass of milk to drink alongside which I hear is traditional? I never thought Japan, or any Asian country for that matter, was a country of milk drinkers. I digress. As I was saying, they taste amazing all on their own. If it went on the X-Factor, it would be one of those contestants that are just naturally really good and unassuming – no gimmicks, flashy lights or manic cheesy backing dancers necessary. Let’s face it though, it would get kicked out. The best ones always do.

So, maybe I’m just going through a phase, but these tasted like the best sweet potatoes I’ve ever had. I’ll definitely be picking up some more next time I see them.

Japanese Sweet Potato

Japanese Sweet Potato

• I used a nice cold pressed Irish rapeseed oil that’s produced by Derrycamma Farm in Co. Louth to drizzle on top before baking. It has a subtle nutty flavour that I really like, but it is quite mild so use whatever you have at hand, whether it be olive, groundnut or sunflower oil, they’ll all work just as well!

Too Hot? Too Spicy? Hot Hot!

It’s no secret that I am a big chilli fan. Sometimes I have to stop myself from putting it in just about everything! There’s just something about the fresh flavour they impart as well as their varying degrees of tongue numbingness that I love and cannot seem to get enough of. And they’re SO versatile. Chilli and chocolate anyone? They are a match made in heaven. After two and a half years of my cooking, Martina has gained quite the chilli tolerance too and can take it like a pro. I feel so proud! Or should I say, after two and a half years of subtly upping the quantity of spice she has not yet noticed! Scooore! I think that is a job well done. Little does she know I’m priming her for a really insane, Man v Food style chilli eating contest! Mwahahaa!*

Chillies come in so many different forms and can be used in a multitude of ways. The ones that are in constant rotation in my kitchen are fresh red and green chillies, dried chillies, Kashmiri chilli powder, the Malaysian sambal oelek, shichimi (Japanese 7 spice powder) Sriracha hot sauce (the Hollywood A-lister of the condiment world, created by Chinese-Vietnamese founder David Tran), a crispy chilli in chilli oil that has fried shallots in it and a photography of a very serious looking Chinese lady on the front and most recently gochujang, a fermented Korean condiment made from red chillies, glutinous rice, fermented soya beans and salt. It would seem I have the bulk of Asia covered! And they’re all fantastic in their own unique way. Oh, and those pickled green chillies you sometimes get on the side when you order falafel? Uhh yes please! Who could refuse that tangy, spicy kick in the tastebuds?!

I do realise that not everyone’s such a huge fan though and people are often told to stay away from spicy foods when they’re feeling unwell. I don’t know about you, but sometimes when I am sick that’s what I find myself craving, especially when I have a cold or I’m feeling congested. At times like this I imagine something hot and fresh, like Tom yam soup, will cut through the sick feeling and come out triumphant! (or at least shoo it away a little faster.) It may not be the best thing to have if you have a stomach bug, but according to Wikipedia, the online fountain of knowledge, chillies are a safe and effective way in relieving arthritis pain, shingles, diabetic neuropathy and headaches. Not that I needed convincing, but anyways, I’m sold!

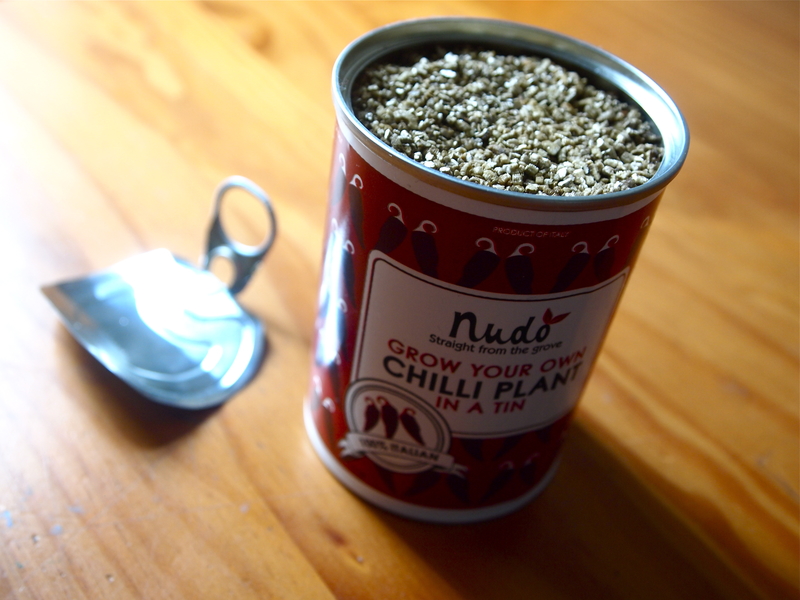
With the amount of chillies that I use in my cooking, I thought it was about time I grew my own. My sister Rachel bought me a nifty little grow your own tin, well, ages ago (sorry Rachie!) that I had yet to use, so yesterday I cracked it out to hopefully send myself on my way to chilli nirvana!

Here look, isn’t it cute? I can’t wait to see all those little Italian chillies start to flourish!

Chillies in a tin

According to psychologist Paul Rozen, eating chillies is a prime example of a “constrained risk”, like riding a roller coaster, so people can enjoy the feelings of pain and fear because they know that these sensations are not actually harmful. This method lets people experience extreme feelings without any risk of bodily harm.

That says it all: If eating chillies is being compared to riding roller coasters, they must be pretty damn amazing.

* And no, I am not ACTUALLY entering Martina into a chilli eating contest. The idea is to help increase tolerance, not annihilate her poor little tastebuds!

Date Night

Sometimes a recipe will come into your life that you will fall in love with and not be able to live without. I believe I have found the one. Surprisingly, it is not what you may think. No, it’s not a cake or pastry, nothing sweet for that matter. It’s not deep fried or saturated with fat, but actually rather healthy. It’s a salad. However, salad is a very general term which, for many, conjures up thoughts of a slice of anaemic tomato on a semi-wilted lettuce leaf. Don’t worry though, this salad could not be further from that! This salad ain’t no lardy boy. You’re looking at a total and utter stud.

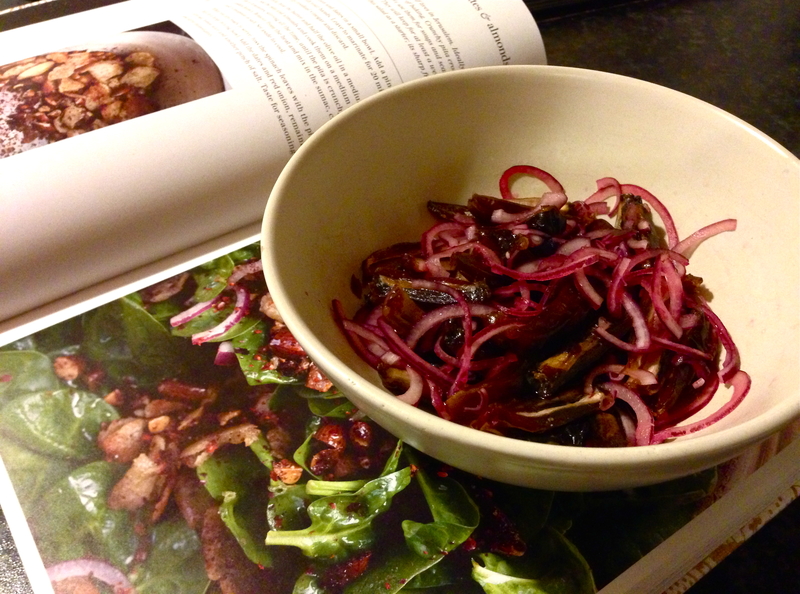
Each person I have made this baby spinach salad with dates and almonds for has been blown away by it, as am I, and continue to be every time I eat it. It’s nice and simple, but it is so much greater than the sum of it’s parts, as the flavours are so perfectly balanced; A bit spicy, a nice tartness from the sumac and lemon, lovely sweet/sour caramel notes from the marinated dates with a savoury hit of onion, the crunch from the fried bread and almonds enriched with a small slick of butter and the crisp baby spinach all work together in perfect harmony! My mouth is watering just thinking of it, for goodness sake!

This little gem is so very tasty, I feel that I could eat it every day and not get sick of it. That’s really saying something, right? I’m not sure I’d want to risk it though. Martina and I eat dinner together every day and like trying different things. I think it’s key to make sure there’s some kind of vegetable or salad with most meals since it’s not only nutritionally beneficial, but the lack of colour on the plate would do my head in. So, at Martina’s suggestion we have decided to have it at least one night a week, and that’s totally fine by me!

Baby spinach salad with dates & almonds – Serves 4

(From ‘Jerusalem’, by Yotam Ottolenghi & Sami Tamimi)

1 Tablespoon white wine vinegar

1/2 medium red onion, thinly sliced

100g pitted medjool dates, quartered lengthways

30g unsalted butter

2 Tablespoons olive oil

2 pitas, roughly torn into 4cm pieces

75g whole almonds, roughly chopped

2 teaspoons sumac

1/2 teaspoon chilli flakes

150g baby spinach, washed

2 Tablespoons lemon juice

salt

Method

Put the vinegar, onion and dates in a small bowl, then add a pinch of salt and mix well with your hands.

Leave to marinate for 20 minutes, then drain any residual vinegar and discard.

Spinach Salad 1

Meanwhile, heat the butter and half the olive oil in a medium frying pan. Add the pita and almonds and cook them on a medium heat for 4-6 minutes, stirring all the time, until the pita is crunchy and golden brown. Remove from the heat and mix in the sumac, chilli and 1/4 teaspoon of salt. Set aside to cool.

Spinach Salad 2

When you are ready to serve, toss the spinach leaves with the pita mix in a large bowl. Add the dates and red onion, remaining olive oil, lemon juice and another pinch of salt. Taste for seasoning and serve immediately.

Spinach Salad 3

Spinach Salad 4

• The crunchy pita croutons can also be used to top soups as a nice alternative to regular croutons. They will keep for at least a week in an airtight container.

Yotam & Sami suggest serving this salad as a starter to really whet the appetite. I think that would be lovely, however this time I ate it as a main course alongside some chicken I had rubbed with spices, spatchcocked, then roasted on thick wedges of red onion and it was delicious. I kept the legs for the following day then tore the meat off the bone and added it to the rest of the salad, along with the roasted onions. Never have I tasted a salad more intensely moreish!

Hummus be kidding me!

Hummus. That simple dish of chickpeas blended with a little tahini, lemon juice, garlic and salt, that somehow manages to have the allure of something much grander. The debate over hummus is ongoing, from where in the Middle East it originated to how it should be prepared and eaten. Chunky or smooth? Warm or room temperature? Blended with or without olive oil? Served as is or with a topping?

And so the list goes on.

I would like to stop for a second and take a breath from the many variations out there, and give you a simple recipe for the hummus I made for lunch today. This came about from not knowing what to make, and after a quick brain rumage of what was in the cupboard I decided I needed to get my hummus on! I realise from past experiences that hummus can be really expensive depending on where you buy it from. Criminal, since it’s generally a very cost efficient thing to make. Since it came to me as a bit of a last minute idea, I made it with a tin of chickpeas instead of going through the whole dried chickpea soaking process. This made it incredibly fast to whip up and took very little work on my part. What I did do, however, was pinch those bad boys out of their little white jackets. I felt in the mood for a nice smooth dip today, so the skins were happily discarded! This is the first time I’ve ever been so precious over a bowl of hummus, but I must say, it was definitely worth the extra smidge of effort and it really didn’t take much time at all. Either way, consider it a labour of love! The silky smoothness was a lovely change from the coarser stuff I’ve become accustomed to, so give it a go and see which way you prefer!

Hummus

Hummus & Pitta Chips

1 tin of chickpeas, skins removed

80 mls (1/3 cup) tahini (sesame paste)

juice of half a lemon, or to taste

1 garlic clove, crushed

salt, to taste

approximately 60 ml (1/4 cup or 4 Tbsp) very cold water

A generous slosh of extra vigin olive oil

1 small tomato (optional)

A sprig of fresh thyme (optional)

A sprinkling of sumac (optional)

A few pitta breads

Method

Place the chickpeas into the bowl of a food processor, reserving a small handful for sprinkling over at the end, and blend to a stiff paste. With the machine still running, add the tahini, lemon juice, garlic and a generous pinch of salt. Add the water in a slow, steady stream, blending until you have a very smooth and creamy paste. Cover the surface with clingfilm and leave to rest for about 30 minutes.

In the meantime, preheat the oven to 200 C.

Cut the pitta bread in half, then into wedges. Put them on a baking tray and coat generously in olive oil, salt, pepper and any other spices you might want. I put cumin seeds on mine, as well as a some Japanese shichimi for a slight kick of heat. Put them in the oven for about 15-20 minutes, or until golden brown.

Top the hummus with a healthy dose of extra vigin olive oil, the remaining chickpeas, some fresh thyme leaves and a small tomato chopped up. Sprinkle with a pinch of salt and some deliciously tangy sumac if you have it.

Now, go and have a tasty lunch and enjoy!

• Hummus is such a super food. A ‘superfood’ in the health kick sense of the word, yes, but really, even more literal than that. It is a super. food. SUPER! I kid you not. It’s cheap and cheerful, tastes wonderful, is satisfyingly filling, healthy and a snap to make. Try to use nice large, soft chickpeas for this. After years of trying different brands from various places, I’ve come to the conclusion that ones you get in Asian supermarkets tend to be vastly superior. Don’t get me wrong, they cost very little, actually probably much less than those from the major supermarkets but the difference in texture is phenominal. Deliciously soft and yielding as opposed to small, hard pellets that are not a pleasure to eat at all! What is that all about?!

Also, bear in mind that these toppings are completely optional. It will still be really tasty with nothing but a splash of olive oil on top! I like to serve some raw veggies on the side too, such as nice fresh carrot sticks or pieces of cucumber with the seeds removed to dip into the remaining hummus.

I remember a couple of years ago reading a wonderful article Yotam Ottolenghi wrote for The Guardian’s Word of Mouth blog called ‘The Perfect Hummus Debate‘, where he goes into more detail about this little wonder of the culinary world! If you’re interested in a little extra light reading, this is well worth a look at. Especially if you want a lovely recipe for hummus with ful, and who in their right mind wouldn’t?!